|
|
|
|
|
|
|
|
|
|
|
|
|
||
|
|
|
|
|||||||||||
|
|
|
||||||||||||
|
|
|||||||||||||
| Isometric Ellipse Lesson - page 4 |
 |
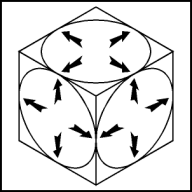
Further test the isometric ellipse by using the Transform Roll-Up to apply a 120 degree rotation to a duplicate. Align (Ctrl+A) that ellipse with the front face. |
 |
Finish the test of the isometric ellipse by using the Transform Roll-Up to apply a 120 degree rotation to a duplicate of the front ellipse. Align (Ctrl+A) that ellipse with the side face. Notice that everything fits and nothing looks bizarre. |
 |
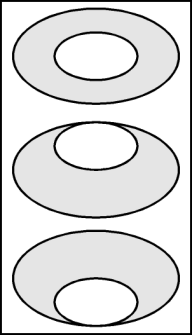
The last step involves understanding how to place ellipses
inside ellipses. To create an ellipse within an ellipse for objects such
as a flat washer apply a 50% scale to a duplicate of the isometric
ellipse. Then align them horizontally and vertically centered. Duplicate (Ctrl+D) both ellipses move down and align them horizontally centered and vertical top. You now have the start of a conical washer facing up. Duplicate (Ctrl+D) both ellipses again move down and align them horizontally centered and vertical bottom. You now have the start of a conical washer facing down or a counter sunk hole. Conclusion |
Purchase our Tech Drawing Tools and work more efficiently
Home,
About, Contact,
FAQ, Shop,
Products, Services,
Learn, Tips
and Tricks, Tools
© 1997 - 2001 John M. Morris