|
|
|
|
|
|
|
|
|
|
|
|
|
||
|
|
|
|
|||||||||||
|
|
|
||||||||||||
|
|
|||||||||||||
| Drawing Isometric Piping - page 5 |
 |
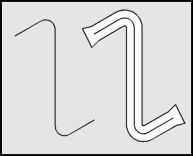
Use the Node Edit Tool (F10) to select in turn segments 2 and 4 and change them to curves with the Node Edit Roll-Up (Ctrl+F10). Then marquee select all of the nodes and smooth them using the Node Edit Roll-Up (Ctrl+F10). Apply a contour from the Effects Roll-Up with the following settings: Outside, Offset 0.1 inch, Steps 1. The thickness of your pipe may differ from that shown. This is due to the scale of the drawings. Simply re-size your drawing until the results look the same, or adjust the offset dimension. |
 |
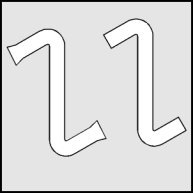
Separate the Contour Group from the Arrange Menu and delete the inner line. Un-Group the outside shape and use the node edit tool to delete one at a time the extra nodes. The result will be flat lines across the ends of the pipe. |
 |
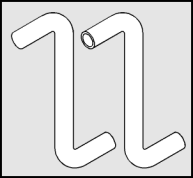
Use the Node Edit Tool (F10) to select the flat ends and change them to curves with the Node Edit Roll-Up (Ctrl+F10). Then select the effected nodes and smooth them. Add the end hole shape that you saved earlier and apply a horizontal mirror. Manually move, size, and position the elliptical hole over the end of your pipe until you achieve the proper result. |
Home,
About, Contact,
FAQ, Shop,
Products, Services,
Learn, Tips
and Tricks, Tools
© 1997 - 2001 John M. Morris