 |

|

|

|

|

|

|

|

|

|

|

|

|
|

|

|
|

|

|

|

|

|

|
|
|

|
|

|

|

|

|

|

|
|
Creating
Isometric Washer Symbols
-
page 3
|
 |
Step 07
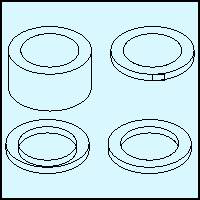
The Split Lock Washer
- A
split lock washer usually has a hole that is about 75 percent of the
outside diameter. Get a copy of the master cylinder. Duplicate the
top ellipse and use the Property Bar to reduce it.
Drag the bottom up to within 0.60 inches of the top surface.
- Dupe
the hole ellipse and move it down the same dimension with the
Property Bar.
- Use
the Shaping Docker to apply an Intersect command.
- Duplicate
the result and put it aside.
|
 |
Step 08
The Split Lock Washer – split centered
- Create
a rectangle 0.75 inches wide by 3.00 inches high. Center
horizontally and position vertically as shown.
- Trim
the rectangle from the bottom edge.
- Combine
(Ctrl+L) the outside and inside top ellipses and trim the rectangle
from them.
- Delete
the rectangle and adjust the nodes of the inside surface as shown.
- Select
the top surface and apply a trim to the inside edge. Combine
everything.
|
 |
Step 09
The Split Lock Washer – split off center
- Go
back to the dupe from step 07. Create a line approximately as shown
and apply a contour of 1 step at 0.35 inches and position as shown
as shown.
- Separate
the contour and delete the line. Adjust the nodes with the Node Edit
Tool so that they exactly meet the top outside line at the position
shown.
- Trim
it from the bottom edge.
- Combine
(Ctrl+L) the outside and inside top ellipses and trim the contour
from them.
- Delete
the contour and adjust the nodes of the inside surface as shown.
- Select
the top surface and apply a trim to the inside edge.
- Create
the rectangle to represent the cut edge, convert to curves (Ctrl+L)
and snap into place. Combine everything.
|
Home,
About, Contact,
FAQ, Shop,
Products, Services,
Learn, Tips
and Tricks, Tools
© 1997 - 2001
John M. Morris


