|
|
|
|
|
|
|
|
|
|
|
|
|
||
|
|
|
|
|||||||||||
|
|
|
||||||||||||
|
|
|||||||||||||
| The Gooney Bird, Locating Complex Structures in Space - page 2 |
 |
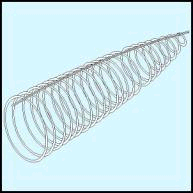
These ribs are 3.50 inches thick just like the previous ones. By duplicating each rib and subtracting 7.00 inches (in our scale 7.00 x 0.02 = 0.14) from the x/y (Width/height) dimension on the Property bar you will have the inside object. Group each rib and fill with white before moving on to the next rib. Once the 12 ribs have been completed use you IsoEval or Isometric Menu to apply a front effect to each of them. | ||||||||||||
 |
Turn on Snap to Objects and position the ribs according to
the following (Refer to last months tutorial for the procedure if you
need a refresher): Water Lines = 165.00, Butt Lines = 0.00, Station Lines:
If you need to annotate the in-between Station Lines (I find it easier) go ahead. Remember to use the 1-inch segments you made last month to help you plot the stations. Once each rib has been positioned ungroup (Ctrl+U) and combine (Ctrl+L) them. |
||||||||||||
 |
In an airframe the ribs are held together with stringers. When you created the ribs you positioned 16 nodes on the outside of them. Now use some of those nodes to plot the stringers. Typically a stringer would be 3 inch Z or L angle. In our scale 3 inches is 0.06 inches but the contour doubles the dimension so use 0.03 inches. Create a line from the isometric top node of the rib at Station 749.00 to the forward rib at Station 411.50. Use the node edit tool (F10) to convert the line to a curve and smooth it out until it looks about correct. You may have noticed some staggering in the rib flow. This is because we are working with information that is not very accurate. Donít worry, Iíll show you how to hide and fudge it convincingly. Add a straight segment to each end of the line that continues the smooth flow. Now apply a Contour to that line that is: 0.03 inch offset, outside, and 1 step. |
Home,
About, Contact,
FAQ, Shop,
Products, Services,
Learn, Tips
and Tricks, Tools
© 1997 - 2001 John M. Morris