|
|
|
|
|
|
|
|
|
|
|
|
|
||
|
|
|
|
|||||||||||
|
|
|
||||||||||||
|
|
|||||||||||||
| Drawing Gears - page 3 |
 |
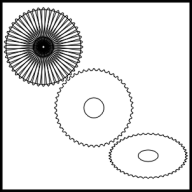
Apply the 7.5 degree rotation to a duplicates until the gear completes. Marquee select everything, deselect the inside circle (hole) and Weld. Select both objects and combine (Ctrl+L) Copy this to a new file to use for the Helical Gear you will draw later. Perform a 57.4 Vertical scale to the gear and apply a white fill. Copy this to a new file for the Bevel Gear you will draw later. |
 |
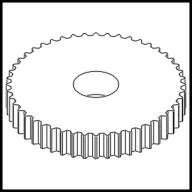
Choose the Extrude Tool with the gear selected and use the following settings: Back Parallel, VP Locked To Object, Vanishing Point; Horizontal 0.0, Vertical -0.129 Measured from: Object Center then Apply. |
 |
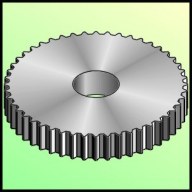
To render: Choose the lighting tool in the Extrude Roll-Up. Set light 1 at the front right top corner 100%, set light 2 at the front right center mark 50%, set light 3 at the back right center mark 50%, and Apply. Separate the Extrude Group (Arrange Menu) and choose the top fill. Choose the Fountain Fill (F11) - Conical and use the following settings: Angle - 30.0 Degrees, Custom with these settings: Position 0 = 40% Gray, Position 25 = 10% Gray, Position 50 = 40% Gray, Position 75 = 10% Gray, Position 100 = 40% Gray. Un-Group everything and delete all of the objects in the center hole except for the largest one, apply a custom Radial fill to achieve the result shown. |
Home,
About, Contact,
FAQ, Shop,
Products, Services,
Learn, Tips
and Tricks, Tools
© 1997 - 2001 John M. Morris