|
|
|
|
|
|
|
|
|
|
|
|
|
||
|
|
|
|
|||||||||||
|
|
|
||||||||||||
|
|
|||||||||||||
| Welding in CorelDRAW - page 8 |
 |
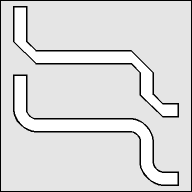
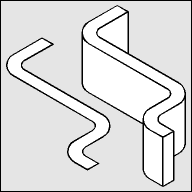
Use the Node Edit Tool (F10) to select a bevel and using the Node Edit Roll-Up change that line to a curve. Repeat for the remaining five beveled lines. Marquee select all of the nodes with the Node Edit Tool (F10) and smooth the curves. The result should look like the lower object. |
 |
Use the Transform Roll-Up to apply the following: Vertical scale 86.6 percent then a Horizontal Skew of -30 degrees and end with a Rotation of -30 degrees. Fill with white and use the Extrude Roll-Up to apply an extrusion with the following settings: Apply an Extrude (Ctrl+E) with these settings: back parallel, VP locked to object, object center, Horizontal 0, Vertical -0.50. If the result is too thick or thin adjust the vertical dimension until it looks right. |
 |
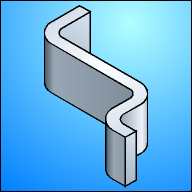
To render: Separate the Extrude Group, click off, select the group and un-group (Ctrl+U). All fills will be Fountain Fills, select the object then (F11). Select the top and apply these settings: Linear, Angle -60 degrees, Custom, Position 0 = C10, M5, K10; Position 50 = White; Position 100 = C10, M5, K10. Select the front/forward and apply these settings: Linear, Custom, Position 0 = C10, M5, K60; Position 42 = C10, M5, K30, Position 100 = C10, M5, K35. Select the front/rear and repeat (Ctrl+R) then move Position 42 to Position 10. Select the side/forward and side/rear and apply these settings: Linear, Angle 60, From = C10, M5, K25, To = C10, M5, K5. Select the side/middle and apply these settings: Linear, Custom, Position 0 = C10, M5, K30; Position 80 = C5, M3, K2; Position 100 = C10, M5, K20. |
Home,
About, Contact,
FAQ, Shop,
Products, Services,
Learn, Tips
and Tricks, Tools
© 1997 - 2001 John M. Morris