|
|
|
|
|
|
|
|
|
|
|
|
|
||
|
|
|
|
|||||||||||
|
|
|
||||||||||||
|
|
|||||||||||||
| Isometric Angles - page 4 |
 |
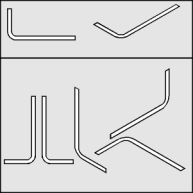
Duplicate the angle that resulted and apply a top isometric effect by using the Transform Roll-Up to apply the following: "Vertical Scale 86.6%, Horizontal Skew 30 degrees, Rotate 30 degrees. Use the Transform Roll-Up to Rotate the original [un-skewed] angle 90 degrees and a Horizontal Mirror. Then apply a -30 degree Vertical Skew followed by a 240 degree Rotation. |
 |
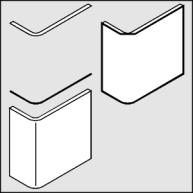
Select the first isometric angle and duplicate it (Ctrl+D.) Move it up using the constrain (Ctrl) key to about the position shown. Choose the Node Edit Tool (F10) and select the lower curve. Break the outside left and right nodes with the Node edit Roll-Up. Break apart (Ctrl+K) the curve and delete the top portion of this curve. Turn on Snap to Objects and select the straight line pencil tool append a line from the left bottom to the left top, then from the right bottom to the right top, connect across the top snapping at the two nodes at the curve and the end point. Add the missing vertical line with the straight line pencil tool. |
 |
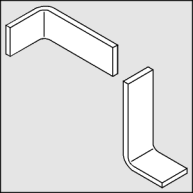
Select the second isometric angle and use the Extrude Tool (Ctrl+E) to apply an extrusion with the following settings: back parallel, VP locked to object, object center, Horizontal 0, Vertical -0.5. If the result is too deep or shallow adjust the vertical dimension until it looks right. If there are extraneous vertical lines on your extrusion they are caused by nodes on the top that are not smooth. Use the Node Edit Tool (F10) and the Node Edit Roll-Up (Ctrl+10) to smooth the offending nodes. Add the missing vertical line with the straight line pencil tool. Marquee select both objects and use the Transform Roll-Up to Rotate this angle 120 degrees. Separate and un-group the extrude group and delete the top object. |
Home,
About, Contact,
FAQ, Shop,
Products, Services,
Learn, Tips
and Tricks, Tools
© 1997 - 2001 John M. Morris