|
|
|
|
|
|
|
|
|
|
|
|
|
||
|
|
|
|
|||||||||||
|
|
|
||||||||||||
|
|
|||||||||||||
| Isometric Angles - page 7 |
 |
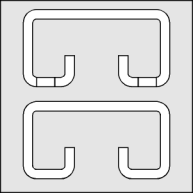
Turn on Snap to Objects and align these angles as shown. Weld all three objects together using the Shaping Roll-Up. Switch to the Node Edit Tool (F10), marquee select all nodes and smooth them. Now delete any extra nodes that resulted from the welding. The object should have 28 nodes. |
 |
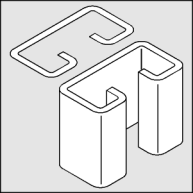
Apply an isometric effect by using the Transform Roll-Up to apply the following: "Vertical Scale 86.6%, Horizontal Skew 30 degrees, Rotate 30 degrees. Choose the Extrude Tool (Ctrl+E) to apply an extrusion with the following settings: back parallel, VP locked to object, object center, Horizontal 0, Vertical -1.5. If the result is too deep or shallow adjust the vertical dimension until it looks right. Add the missing vertical lines with the straight line pencil tool. |
 |
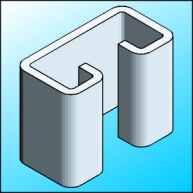
To render: Select the top and apply a Uniform Fill (Shift+F11) of C15, M5, K5. Select the extrude group and use the lighting in the Extrude Roll-Up (Ctrl+E) to set the lighting as follows: Light 1 = front/top/center 50%; Light 2 = front/middle/right 50%; Light 3 = front/bottom/right 30%. |
Home,
About, Contact,
FAQ, Shop,
Products, Services,
Learn, Tips
and Tricks, Tools
© 1997 - 2001 John M. Morris