|
|
|
|
|
|
|
|
|
|
|
|
|
||
|
|
|
|
|||||||||||
|
|
|
||||||||||||
|
|
|||||||||||||
| Working Efficiently 3 - page 2 |
 |
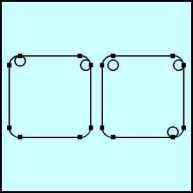
Choose the Ellipse Tool and create a .25" circle (Hold down the constrain key (Ctrl) and watch the status line). Use the property to correct the size. To position the circle turn on Snap To Objects and snap a circle to the top left node on the rectangle. Duplicate the circle and snap it to the right top node as shown on the left. Select the left circle, shift click select the right circle and Align (Ctrl+A) vertically. Repeat for the remaining holes. By using the properties of the objects and the tools provided by CorelDRAW (Align and Snaps) what could have been a tedious operation took very little time. Once all of the circles are positioned marquee select the rectangle and the four holes and combine them (Ctrl+L). |
 |
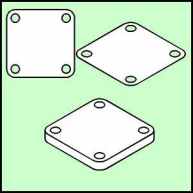
Fill the object with white and convert it to an isometric top-front view by applying Ctrl+Alt+G, or choosing that command from the appropriate menu. Now use the Extrude Roll-up to apply the following to both objects: Back Parallel, VP Locked to object, Vanishing Point H = 0.0" V = -0.25", Object center, Apply. |
 |
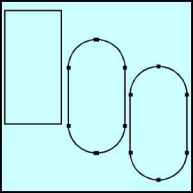
To develop the body, choose the rectangle tool and create a 1.875 inch wide by 4 inch high rectangle. If you are using CorelDRAW 7 or 8 you can use the Property Bar to make minor corrections only. Use the Node Edit tool to completely round the corners of the rectangle and convert to curves (Ctrl+Q). Since there are two nodes at the both the top and bottom delete them by marquee selecting them with the Node Edit Tool (F10) and hitting the delete key. Marquee select the four remaining nodes and hit the plus sign on the Node Edit Roll-up (Ctrl+F10) to add a top and bottom node to the object. Delete the extra side nodes. Since the top of the body is round it will stay round. |
Home,
About, Contact,
FAQ, Shop,
Products, Services,
Learn, Tips
and Tricks, Tools
© 1997 - 2001 John M. Morris