|
|
|
|
|
|
|
|
|
|
|
|
|
||
|
|
|
|
|||||||||||
|
|
|
||||||||||||
|
|
|||||||||||||
| Creating Extrusions - page 7 |
 |
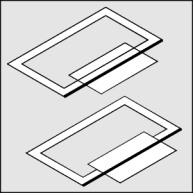
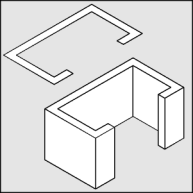
To center along an isometric axis - Turn on Snap to Objects and draw a straight line [shown as the dark line] along the lower right surface. With the Pick Tool select the reduced object and (Shift+Click) the line and Align (Ctrl+A) Horizontal and Vertical. Use the Trim command from the Shape Roll-Up to remove the overlapping section. Delete the line and the trimming object. |
 |
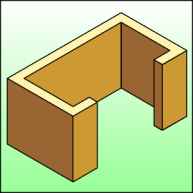
Use the Extrude Tool (Ctrl+E) to apply an extrusions to each object with the following settings: back parallel, VP locked to object, object center, Horizontal 0, Vertical -1.0. If the result is too deep or shallow adjust the vertical dimension until it looks right. |
 |
To render: Apply uniform fills as follows: Top = C5, M2; Front = C10, M5, K50; Side = C10, M5, K25. |
Home,
About, Contact,
FAQ, Shop,
Products, Services,
Learn, Tips
and Tricks, Tools
© 1997 - 2001 John M. Morris