|
|
|
|
|
|
|
|
|
|
|
|
|
||
|
|
|
|
|||||||||||
|
|
|
||||||||||||
|
|
|||||||||||||
| Trimming Objects - page 4 |
 |
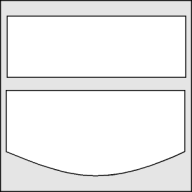
Use the Rectangle Tool (F6) to create a 2 wide x 0.7 inch high object. Convert to curves (Ctrl+Q) and use the Node Edit Tool (F10) and Node Edit Roll-Up (Ctrl+F10) to change the bottom line into a curve. Now drag the handles to achieve the shape shown. Keep the curve symmetrical. |
 |
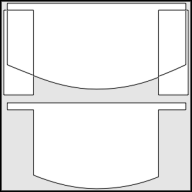
Create another rectangle to cut out the left side. Duplicate it (Ctrl+D) and drag it to the right side using the constrain (Crtl) key. Combine (Ctrl+L) both of these and align horizontally (Ctrl+A). Use the Trim command to remove the outside sections. |
 |
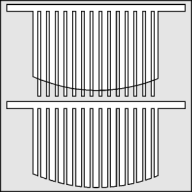
Select and break apart the (Ctrl+K) rectangles and use the side handles to reduce the thickness to close to what I have shown. Using the Pick Tool and constrain (Ctrl) key position them just inside the lower part of the heat sink. Apply a blend (Ctrl+B) of 12 steps. Separate and un-group the blend and combine (Ctrl+L). Use the Trim command to remove the remaining sections. Remove the trimming object. |
Home,
About, Contact,
FAQ, Shop,
Products, Services,
Learn, Tips
and Tricks, Tools
© 1997 - 2001 John M. Morris