|
|
|
|
|
|
|
|
|
|
|
|
|
||
|
|
|
|
|||||||||||
|
|
|
||||||||||||
|
|
|||||||||||||
| Trimming Objects - page 11 |
 |
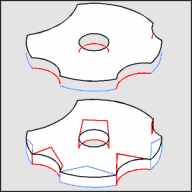
Duplicate (Ctrl+D) this shape and move it down by nudging it with the arrow key. Send this object to the back (Shift+Page Down). Break the nodes with the Node Edit tool (F10) to produce the seven bottom edges. Break apart (Ctrl+K) and delete the extra curves. They are shown with alternating blue and red lines. Turn on Snap to Objects, select the straight line pencil tool and complete each objects as shows. |
 |
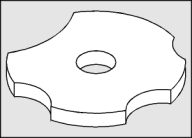
Filling with white and moving the top to the front (Shift+Page Up) completes the cam. Adjust the front to back order of the lower objects if necessary. |
 |
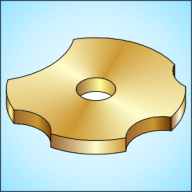
To render: Apply a Fountain Fill (F11) to the top with these settings: Conical, Angle 60, Custom, Position 0 = M20, Y60, K20; Position 50 = Y20, Position 100 = M20, Y60, K20. Select the hole and apply a Fountain Fill (F11) with these settings: Linear, Custom, Position 0 = M20, Y40, K40; Position 60 = Y40; Position 100 = M20, Y60, K20. Select the far left face and repeat (Ctrl+R) the fill. Select the left and just right of center faces and apply a Fountain Fill (F11) with these settings: Linear, Custom, Position 0 = M20, Y40, K40; Position 60 = M20, Y60, K20; Position 100 = M20, Y40, K60. Select the center face and apply a Fountain Fill (F11) with these settings: Linear, Custom, Position 0 = M20, Y40, K40; Position 60 = M20, Y60; Position 100 = M20, Y60, K20. Select the mid right face and apply a Fountain Fill (F11) with these settings: Linear, Custom, Position 0 = M20, Y40, K40; Position 60 = M20, Y60; Position 100 = M20, Y60, K20. Select the far right - rear face and apply a Uniform Fill (F11) M20, Y40, K60. |
Home,
About, Contact,
FAQ, Shop,
Products, Services,
Learn, Tips
and Tricks, Tools
© 1997 - 2001 John M. Morris